rpnix
New Member
 Don't try this at home....
Posts: 28
|
Post by rpnix on Oct 8, 2006 8:47:21 GMT -5
Actually, with the ease of adding links to other photo archives, and the availability of places to store and show your photos, especially Flickr, it's really unnecessary to start another repository. Open a Flickr account, and then learn how to use the Img tag here (the picture frame in the second row of icons in the editing window). Flickr will give you links to several sizes of each picture, so you can choose what you want here easily. And, sites like Flickr have done all the work of designing an upload workflow and handling the storage of the pictures... Why would you want to duplicate all that work? 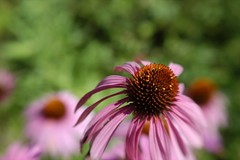 It's just that simple; Try it, and you'll want to post everything you've done here. |
|
rpnix
New Member
Don't try this at home....
Posts: 28
|
Post by rpnix on Oct 12, 2006 7:45:39 GMT -5
A couple of shots of "frozen motion". I love the five frames a second on the D200! 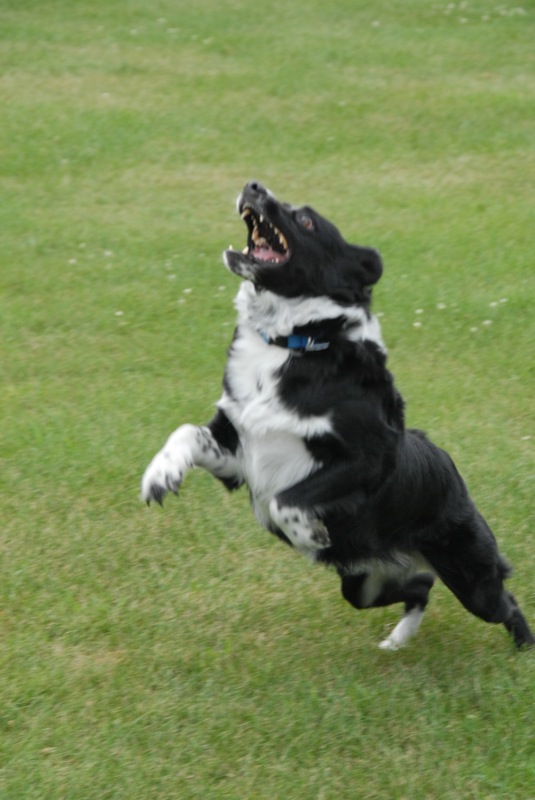 She looks so "evil" in this shot, but she's just launched to catch a frisbie. 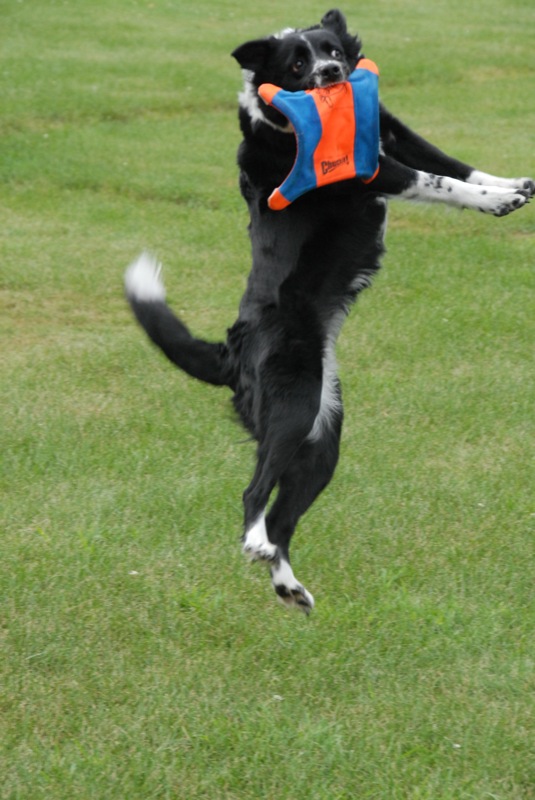 One of many airborn catches. This dog will literally fetch a frisbie (or ball, or stick...) until she falls down and passes out. |
|
rpnix
New Member
Don't try this at home....
Posts: 28
|
Post by rpnix on Sept 22, 2006 10:34:13 GMT -5
I thought I had a good clear sky.... But that darn bird flew through... 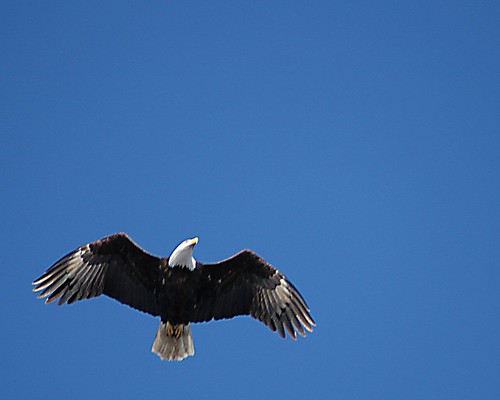 Taken outside the National Eagle Center, Wabasha, MN Photo hosted on Flickr: www.flickr.com/photos/simplyphotography(Not this month; This one came from my archives, so it may not actually qualify for the assignment. Going back there Sunday though...) |
|
rpnix
New Member
Don't try this at home....
Posts: 28
|
Post by rpnix on Oct 6, 2006 9:21:39 GMT -5
I'm late in noticing this thread, but thought I'd add some detail to it. I'm using a free flickr account, and have been linking to images there without problem. Go to your flickr photos page, and pick the image you want to include. Click on the image to select it. Above the image are several icons, one of which is "All sizes". Click this icon. You'll get a page with links across the top, such as "Square", "Small", "Medium" and "Large". These also tell the size of each image. Click on your choice to include here. (I'll do small and medium as examples, below). Below the picture are two text boxes. the first contains the full html needed to include the image in an html page, along with a link to your flickr page and attribution to flickr. This is the way flickr would like to see all images used from their site. The second text box contains just the url needed to get the picture, without any links or attribution. Copy this second text box. When editing here, there are a number of tags listed above the message text box. In the second row, the fourth icon looks like a picture in a frame. Click this, and you'll get an img tag that will be recognized by the editor here. It will look something like: (img)(/img) (I changed the square brackets to parens to keep it from being processed.) Between the tags, paste the url you copied from the flickr site, such as: (img)http://static.flickr.com/61/255834937_1d21fe1417_m.jpg(/img) This produces:  This was the "small" version of the image. If you wanted a larger picture in the message, on flickr, select "medium", and copy the link, then put it here: (img)http://static.flickr.com/61/255834937_1d21fe1417.jpg(/img) to get this: 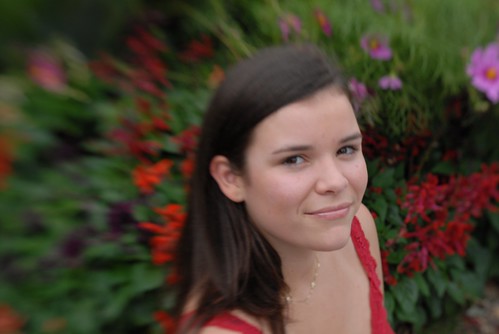 Thus, a larger version of the same image. Remember that I used parens in my examples so that they wouldn't actually work, but in practice (and in reality, where the pictures are actually included above), use square brackets to create the tags. I hope this was clear, and helps someone enjoy the AllNikons forum a bit more. I know I'll injoy your pictures more when I don't have to go hunt for them...  |
|
rpnix
New Member
Don't try this at home....
Posts: 28
|
Post by rpnix on Sept 1, 2006 7:46:23 GMT -5
Great photos! You have a very good eye for composition. I especially like the women in the grass.
|
|
rpnix
New Member
Don't try this at home....
Posts: 28
|
Post by rpnix on Oct 8, 2006 8:40:27 GMT -5
Our commercial website is www.simplyphotography.bizPlease take a look, especially at the galleries, and let me know what you think. The individual galleries were created with jAlbum. The rest of the site is our own design and implemented by hand. |
|
rpnix
New Member
Don't try this at home....
Posts: 28
|
Post by rpnix on Aug 30, 2006 7:47:11 GMT -5
www.simplyphotography.bizJust blowing my own horn, and looking for opinions on the website. (And if you're in SE Minnesota or NE Iowa and need a photographer, maybe you'll remember me... Can't hurt, right?) Everything we've done has been shot with Nikon cameras and equipment. (Just tying this in with the theme of the forum...  )
|
|
rpnix
New Member
Don't try this at home....
Posts: 28
|
Post by rpnix on Sept 1, 2006 8:42:47 GMT -5
OK; I'm confused....
There's no more or less "room" for data at the left end of the histogram than at the right... The histogram shows the amount of pixels at each light level. So let's think about this a bit...
A pixel is represented as an RGB value (Red, Green, Blue). Each of these values is one byte long, giving a fixed range of values from 0 (all bits off) to 255 (all bits on). These three bytes together give us the "24 bit color model" we've come to know and love.
If all three bytes in the pixel are near the zero end, then the pixel is dark (000000 hex being black). If they're near the 255 value, the high end, then the pixel is light (FFFFFF hex being white). Colors are made by mixing the three primary colors, so a medium high value for R and G, with a lower value for B, will give you a yellow. (I think; It's early here...) It'd look something like EDA522 hex.
That being said, there's a continuous scale of brightness across the range, with no bias to the high or low end.
What you'd really like for your histogram would be a traditional school exam bell curve (which I usually blew for everyone else, but that's another story...) Very few pixels at the low end, and very few pixels at the high end, with the majority grouped largely in the middle. Things you don't want to see are a large spike at either end. If at the left end, then the photo will be dark, and you'll be losing details in the shadows (although this isn't really a problem if you're taking a picture of a black wall.... every rule has exceptions). If the spike is at the right end, then you'll have very bright, or washed out spots in your photo, again losing detail.
You also don't want your bell curve skewed to the left or right of center in most cases. If it is, you're losing contrast. If you take a picture like this into an editor (PS, GIMP, PaintShop Pro...) and drag the curve to the left and right ends, you'll be amazed at how much better the picture will look, because you'll have spread the curve out to use all the pixel values, instead of being bunched at one end.
Remember high school and shoot for the bell curve.
|
|
rpnix
New Member
Don't try this at home....
Posts: 28
|
Post by rpnix on Aug 25, 2006 13:19:13 GMT -5
I was browsing through Barnes & Noble, and found "The Nikon D200 Digital Field Guide" by David D. Busch, Wiley Publishing. It looks interesting, and could maybe provide hints that address some of the concerns I've seen about the D200. In any case, I'll begin reading tonight...
|
|
rpnix
New Member
Don't try this at home....
Posts: 28
|
Post by rpnix on Aug 25, 2006 7:58:43 GMT -5
Is there a reason you want to shoot in manual? Doing so fairly much defeats all of the features of the camera. Manual assumes that you're going to do your own metering, all of the automatic settings, ... all the bells and whistles you've paid for. When you shoot in manual, you literally get what you, and not the camera, can do. Not to be blunt, and please don't take this the wrong way, but if you're disappointed with the results you're getting in manual mode, then you need to look at how you're doing the aperture and the shutter speed and correct your assumptions about the settings.
Are you using any sort of hand-held meter to assist you in setting the F/ and speed while using manual? If not, then that's going to be a huge part of your problem. Other than guidelines like the "Sunny 16" rule, you really need some specific guidance to get a good shot, either by allowing the camera to help (modes S, A and P), or by using an external source of information, such as a light meter.
|
|
rpnix
New Member
Don't try this at home....
Posts: 28
|
Post by rpnix on Oct 26, 2006 13:23:27 GMT -5
What part makes no sense? It's a lens that performs a function that can't be reproduced via software on the back end (i.e. photoshop). It's a neat effect for closeup, macro, portrait, and landscape photography. It's an extension to depth-of-field.
It's a tool that you can add to your toolbox so that you can produce additional styles of photo.
|
|
rpnix
New Member
Don't try this at home....
Posts: 28
|
Post by rpnix on Aug 29, 2006 13:44:13 GMT -5
I got mine from the source: www.lensbabies.com/; I also found on on e-bay for $174... The price from LensBabies is only $150, so I'm not sure what the people on e-bay are smoking, .... but I'd like some. Actually, there's another one on e-bay currently at $50, but with five days left, I'm sure it'll be bid up . Truely, the best place to get one would be from LensBabies itself. Then you don't have to hassle with the e-bay bidding and wondering what you'll really get. Good luck, and get bent. ;D |
|
rpnix
New Member
Don't try this at home....
Posts: 28
|
Post by rpnix on Aug 25, 2006 13:32:08 GMT -5
Since there appears to be not too much action here, I thought I'd start. I've been shooting with a LensBaby 2.0 ( www.lensbabies.com/), which is a manual lens. In fact, it's so "manual" that the aperture is a set of removable rings ranging from F/2.0 to F/8.0. It is a "selective focus" lens, much the same concept as the old bellows cameras, with the focus controled by compressing or expanding the bellows with your fingers. Very creative and very interesting results.  |
|
rpnix
New Member
Don't try this at home....
Posts: 28
|
Post by rpnix on Aug 25, 2006 7:49:26 GMT -5
 Just testing to see if the forum is "image friendly". If this works, then maybe we'll see more of everyone's work right here in the forum, rather than having to follow random links to other sites... This photo was taken with my D200 and the LensBaby. Hope you enjoy! |
|
rpnix
New Member
Don't try this at home....
Posts: 28
|
Post by rpnix on Aug 25, 2006 7:42:17 GMT -5
Hi; I'm Bob Nix, and I'm in Rochester, Minnesota. I shoot a D200 with the portrait grip, the 18-200 VR lens, and an SB600 flash. You can see some of my work at www.simplyphotography.biz and at www.flickr.com/photos/simplyphotography/. I also have a LensBaby 2.0 lens that's been both fun and useful. Again, see the Flickr site for some examples. The D200 is replacing my D100, and I've been very happy with it thus far. I just finished working at a camp for children with cancer ( www.campjornada.com), and I and a co-photographer shot 5400 photos for the week. I'd say the D200 has been "broken in". I shoot weddings and senior portraits to fund my habit for photographic equipment, and shoot wildlife and nature for enjoyment. When I'm not behind a camera, I manage and maintain a block of virtual Linux servers and an IBM zVM system for a large midwestern medical clinic. Hope to learn here; glad to help when able. -- Robert Nix |
|


 )
)